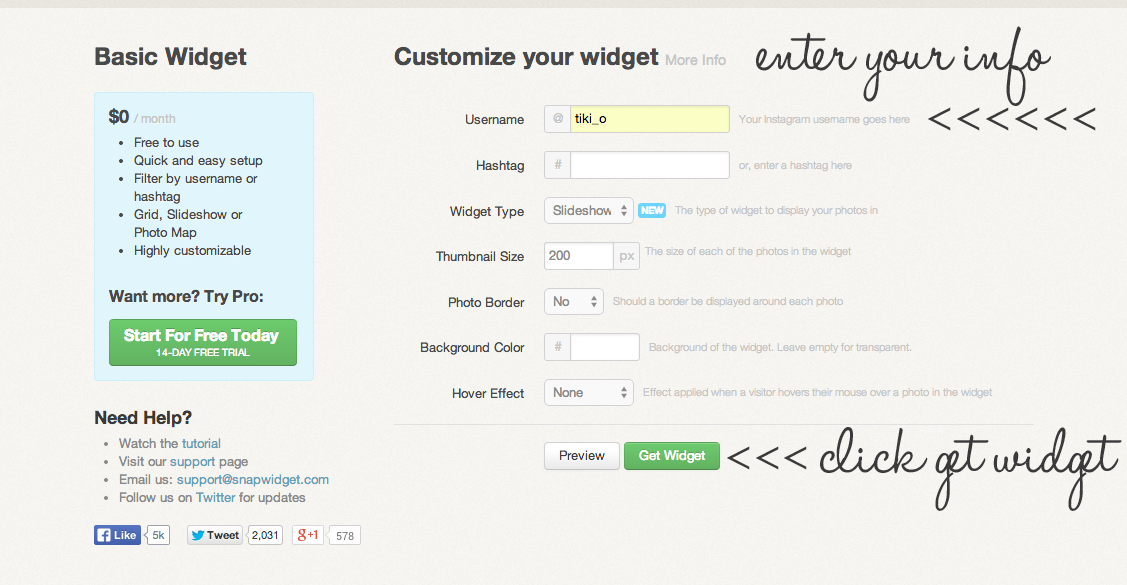
There is this really great website called SNAPWIDGET and they have the option to make a free widget. You wouldn't believe just how easy it is to do.

It's really that simple.
1. Enter your username
2. If you want just a certain hashtag to show then just type that in.
3. Choose your widget type. I like to do the slideshow widget.
4. Choose your widget size. Its a good idea to know what your sidebar width is for this part. 200px is usually a good number though.
5. You edit your photo border, background color, and hover effect. But I typically leave these three items alone.
6. Preview your your widget and make sure it's to your liking.
7. Grab your code. It should look like this:
<!-- SnapWidget -->
<iframe src="http://snapwidget.com/sl/?u=dGlraV9vfGlufDIwMHwzfDN8fG5vfDV8bm9uZXxvblN0YXJ0fHllcw==&v=16714" title="Instagram Widget" allowTransparency="true" frameborder="0" scrolling="no" style="border:none; overflow:hidden; width:205px; height:205px"></iframe>
9. Now you just paste in that code. If you want it to be centered then you just <center>YOUR CODE HERE</center>.
10. Move the widget wherever you would like it placed and then hit save!
Now you can share your Instagram images with your readers as well!
