7.23.2014

Embed A Youtube Video Into Your Blog

I don't know about you, but I LOVE being able to share some of my videos on my personal blog. There is a way to add videos through blogger. But let's be honest, they just don't look nearly as nice as they could. So today I thought I would post a simple tutorial on how to post a video to your blog via YouTube.


It really is a rather easy thing to do once you have an idea of what your doing.

1. First and foremost you want to record your video. It doesn't matter if you do it on your phone or your camera. Just record it and upload it to your youtube account. Easy so far right? If you don't have an account it is super easy and free to set up!!!

2. Once you have your video uploaded and saved you will see three little tabe below it. Share, Embed, and Email. You are going to want to click the embed option and it should look like this!
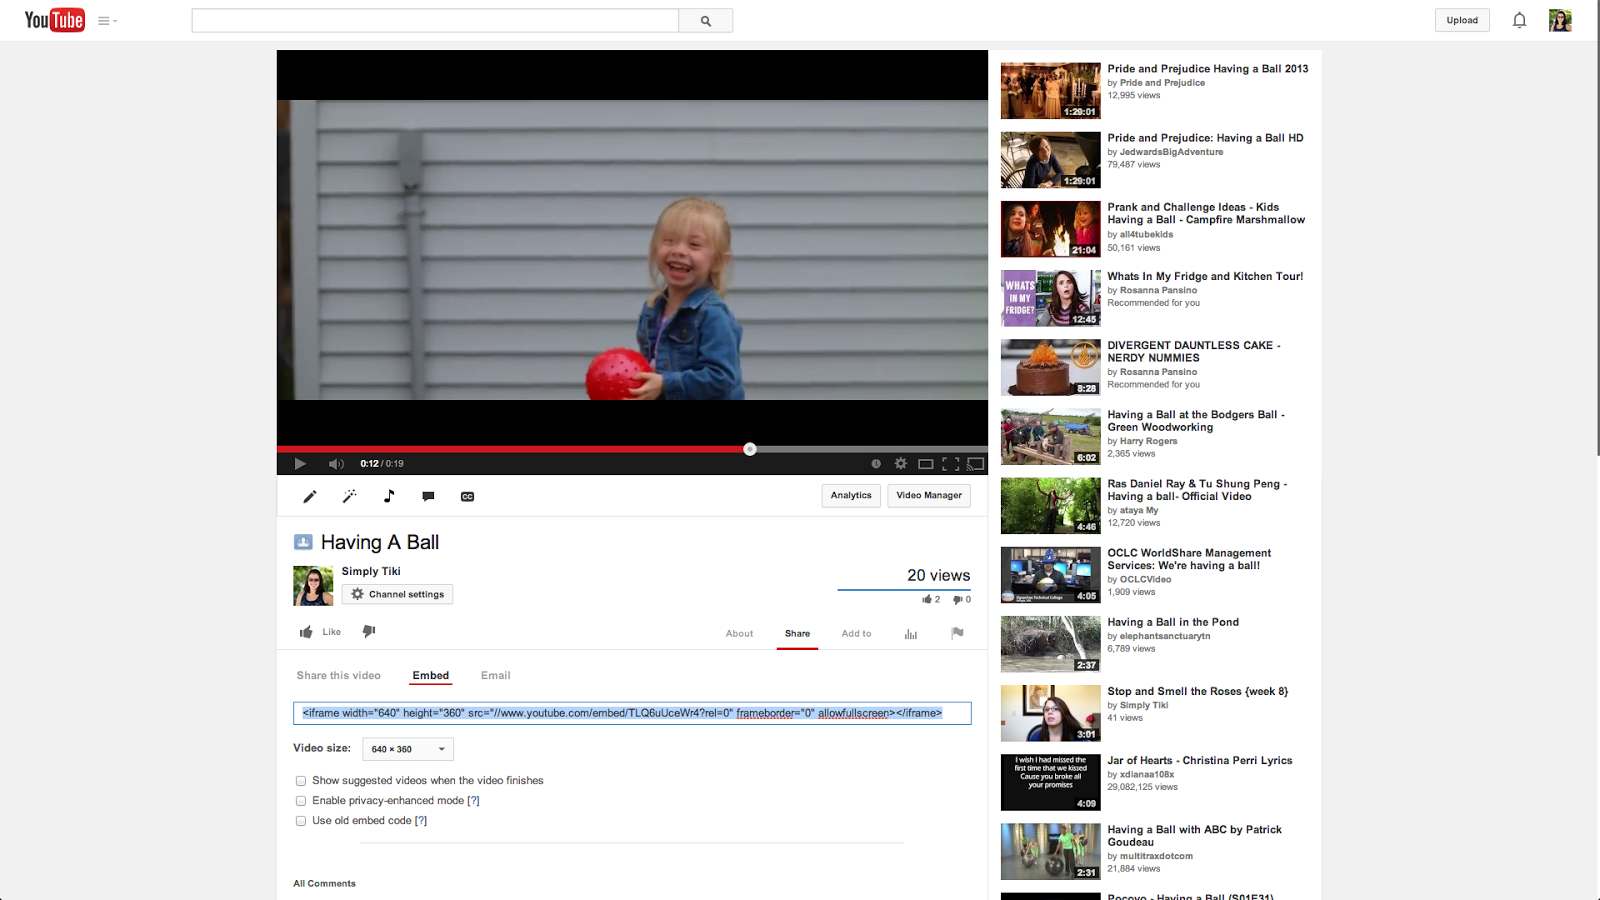
There are a couple changes you can always make. I always click the 640 by 360 option for the size and remove the suggested videos option. Once you have made your edits, you are going to highlight the code in the box and copy it. It should look something like this:
<iframe width="640" height="360" src="//www.youtube.com/embed/TLQ6uUceWr4?rel=0" frameborder="0" allowfullscreen></iframe>

3. Now you are going to go into blogger! Open your post and click the HTML tab in the upper left corner of your posting space. Once you have done that you will paste in the code below whatever you have typed. 
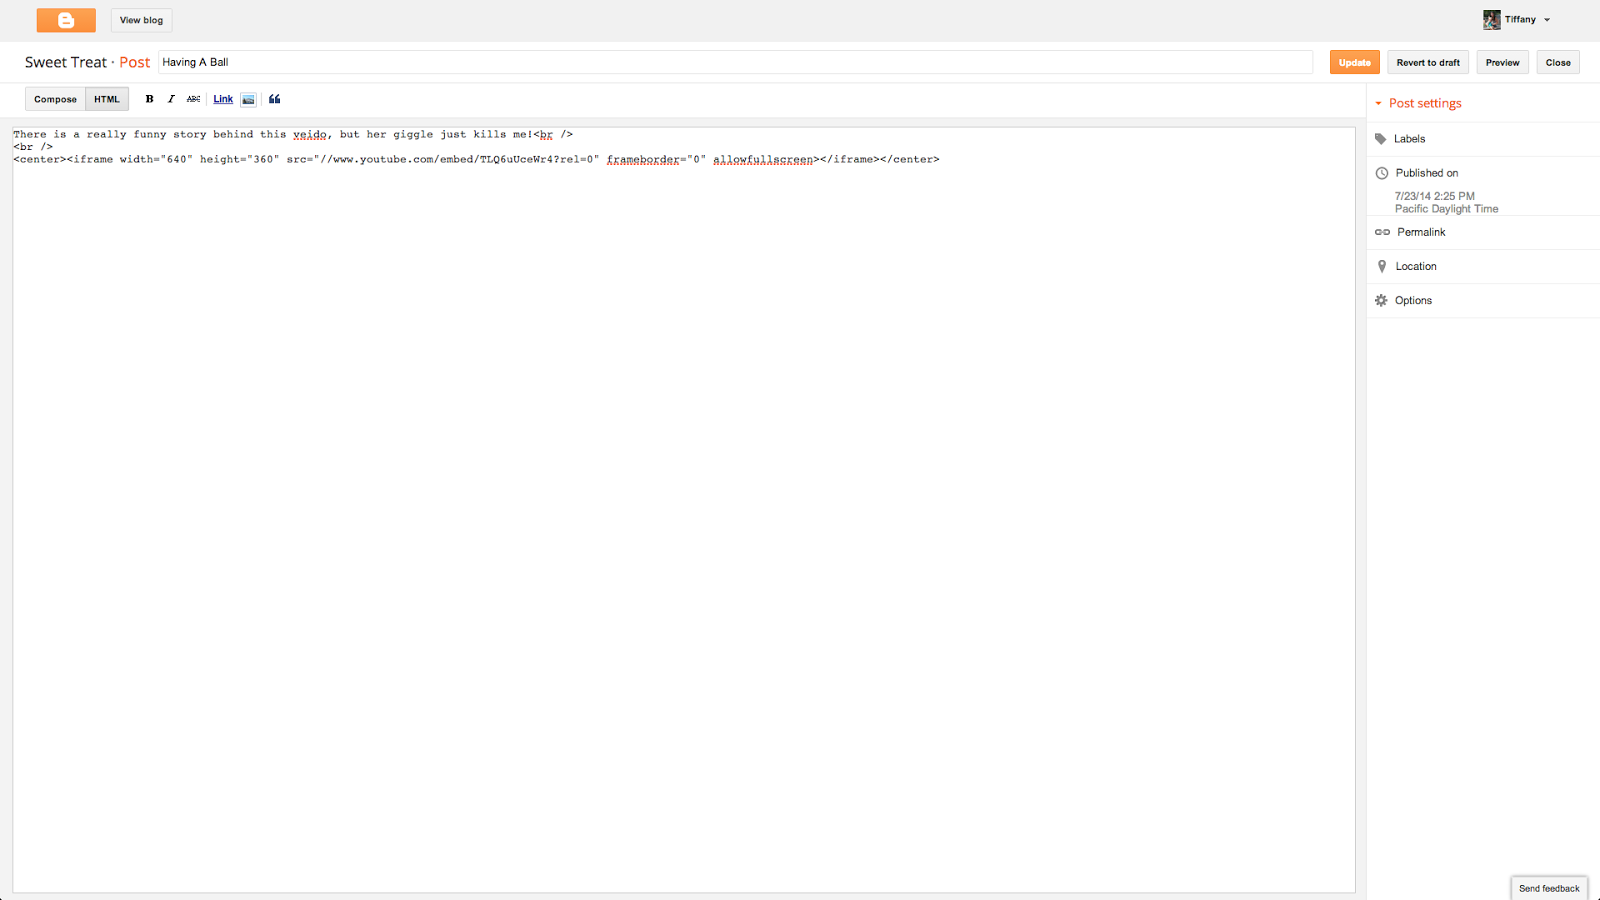
I also center the code by putting <center> before it and </center> directly after it. So then it looks like this. <center><iframe width="640" height="360" src="//www.youtube.com/embed/TLQ6uUceWr4?rel=0" frameborder="0" allowfullscreen></iframe></center>

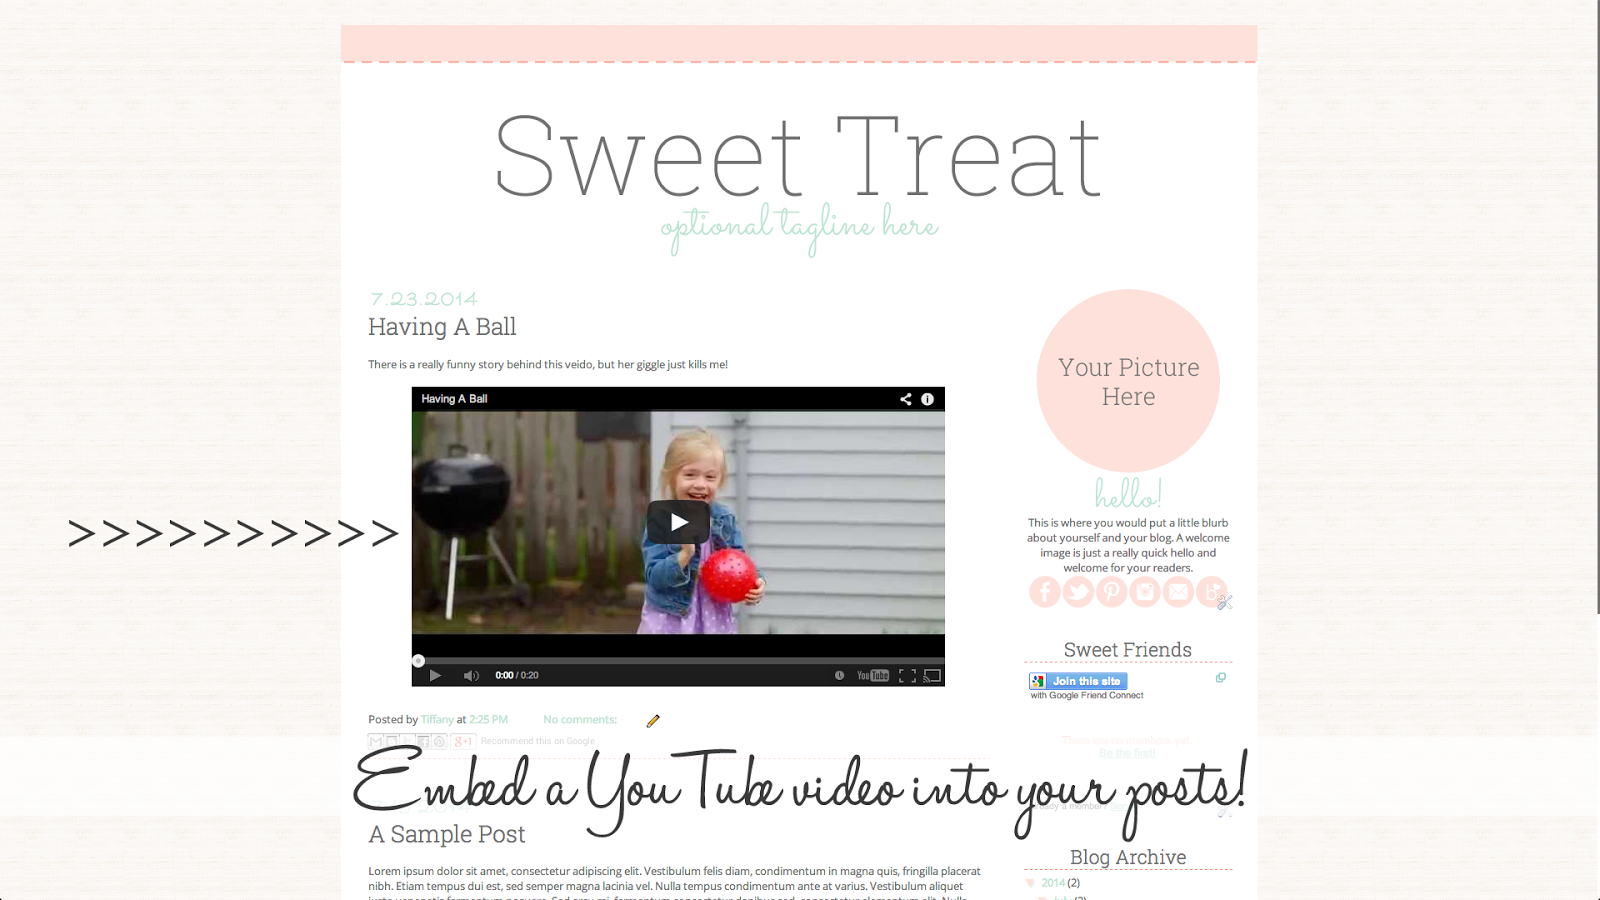
4. Now you will go back to compose mode and finish up your post. Once you are all done make sure you hit the preview option and it should look something like this!

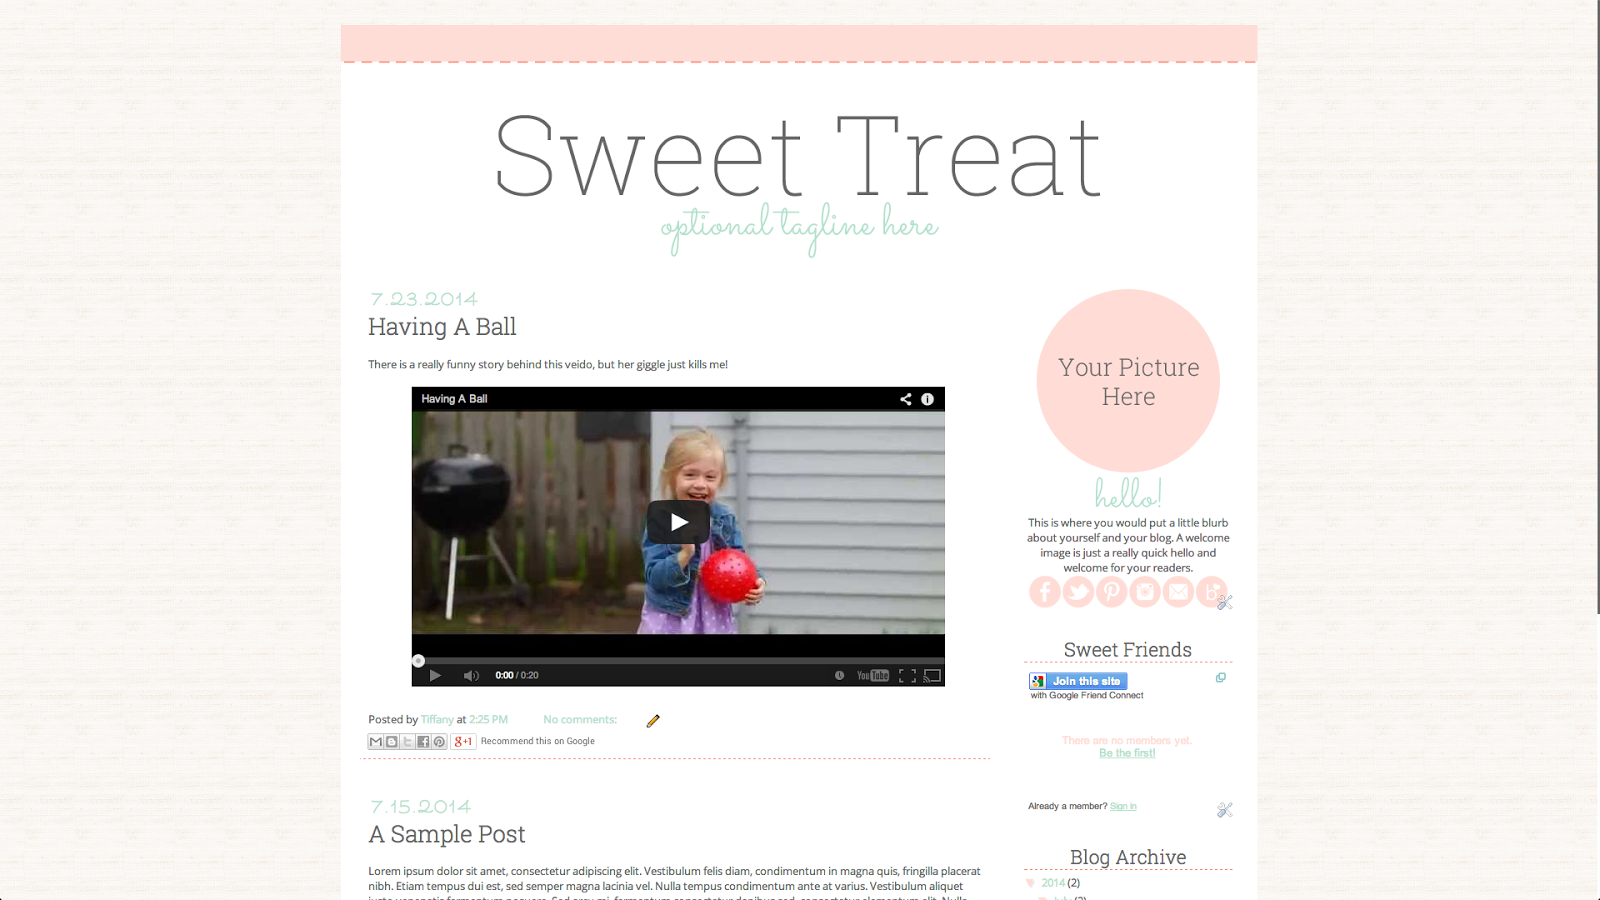
See, I told you this was easy! There is no reason that words and pictures should be the only way you share things on your blog posts!

7.16.2014

Add Instagram Widget To Your Sidebar

As Instagram has gotten more and more popular, people have started really wanting to add an Instagram widget to their sidebar.


There is this really great website called SNAPWIDGET and they have the option to make a free widget. You wouldn't believe just how easy it is to do. 


It's really that simple.

1. Enter your username
2. If you want just a certain hashtag to show then just type that in. 
3. Choose your widget type. I like to do the slideshow widget. 
4. Choose your widget size. Its a good idea to know what your sidebar width is for this part. 200px is usually a good number though. 
5. You edit your photo border, background color, and hover effect. But I typically leave these three items alone. 
6. Preview your your widget and make sure it's to your liking.
7. Grab your code. It should look like this:
<!-- SnapWidget -->
<iframe src="http://snapwidget.com/sl/?u=dGlraV9vfGlufDIwMHwzfDN8fG5vfDV8bm9uZXxvblN0YXJ0fHllcw==&v=16714" title="Instagram Widget" allowTransparency="true" frameborder="0" scrolling="no" style="border:none; overflow:hidden; width:205px; height:205px"></iframe>
8. Go to your Blogger layout page and click add a gadget. Scroll down until you see HTML/JAVASCRIPT and click the little plus sign.
9. Now you just paste in that code. If you want it to be centered then you just <center>YOUR CODE HERE</center>.
10. Move the widget wherever you would like it placed and then hit save!

Now you can share your Instagram images with your readers as well!